DIY Biochar
|
Re: DIY Biochar
wow... the guy at around 1:16 is hardcore! he straight up just ate a piece of charcoal.
|
Re: DIY Biochar
Henry Ford (Ford Motor Company) was the King of biochar...
Kingsford Charcoal......Lump works pretty good in the Green Egg. :woohoonaner: .http://en.wikipedia.org/wiki/Kingsford_(charcoal) |
Re: DIY Biochar
^the only thing i cook with is lump
|
Re: DIY Biochar
Quote:
Lump is good and HOT and will put a nice fast wanted char on a piece of beef. Making me hungry just typing it:) However for the Backyard Gardner.... Go to the Store and buy a bag of Lump Charcoal any brand will do. Lay the lump charcoal on the driveway and bust it up in small pieces. Mix a alittle Espoma Organic Garden Fertilizer or another product of your choice in the charcoal bits . Lightly wet it the mix and let sit for a bit... mix well. And now you can put it in your favorite mix. Each piece of charcoal will now be an oasis of nutrients for your plants. |
Re: DIY Biochar
I burn my yard debris and get a lot of charcoal if I rake the burning embers around instead of letting them cook down to ash. I mix that in with dirt and sawdust for excellent tree and shrub mix.
Charcoal briquettes have coal dust in them as well, which is why you get that sulfurous odor while its burning. IDK if that will affect the results or not if you were to use it. Seems to me as though it would tend to drop the pH significantly though. |
Re: DIY Biochar
Quote:
|
Re: DIY Biochar
Coal weighs more than charcoal, so that may be the reason. I'd never noticed that myself; thanks for pointing it out!
|
Re: DIY Biochar
Bump..tis the season to mix your own soilless mix with charcoal, for those new plants this year.
If you have the opportunity to make this do it. This is a must have amendment to your special soil for all your great container plants |
Re: DIY Biochar
At a local nursery where I live in sw fl, they sell 20 or 30 pound bags of finely ground bio char. Works perfect in my potting mixes as well as supplementing in ground planting areas.
|
Re: DIY Biochar
Quote:
|
Re: DIY Biochar
I want to say $3.99
|
Re: DIY Biochar
Quote:
|
Re: DIY Biochar
Quote:
https://store.bigearthsupply.com/677...id=221601&cat= I never knew how they mentioned quantity for biochar but they list it on the site as 1 cubic foot bag. Sort of the same thing for worm castings as I bought a bag to try that out for $16.99 The bag feels like it is 20# but I should weigh it. I should weight the Bio Char bag too as it is very heavy for a 1cu ft bag. EDIT I went back to the site and the Worm Castings say 28# but the bag I have doesn't feel that heavy, and I think I paid $16.99 not $15.99 like the site says. |
Re: DIY Biochar
Its grill season again.:08:
During the holidays lump griling charcoal is on sale at the big box stores Pick up a bag and pound it to small pieces to make your inexpensive soil conditioners. A little goes a long way and it lasts forever plus your soilless mix or soil will benefit greatly. |
Re: DIY Biochar
When I was a kid, I made my own charcoal to use in making gunpowder because the charcoal briquettes sold for barbequing are useless for that purpose. The more porous the charcoal, the faster the gunpowder burns. The less dense the wood, the more porous the charcoal. I found balsa wood to be best, although it is too expensive for commercial production of gunpowder.
My procedure for making charcoal was to take a coffee can with a tight fitting metal lid and punch about 10 nail holes in the bottom of the can. After putting wood into the can, I put it on a stove burner so that the gas escaped from the bottom of the can into the flame of the stove burner. That increased the fuel efficiency while reducing the stink, but, it was still necessary to open a window to ventilate the room. |
Re: DIY Biochar
Quote:
|
Re: DIY Biochar
Quote:
|
Re: DIY Biochar
Quote:
|
Re: DIY Biochar
We use tons of biochar, it's lightweight, absorbent, and easily breaks with your hands.
https://www.biofuelsdigest.com/bdige...arbon-markets/ First, lets explain the basic difference between THREE materials: activated carbon, charcoal and biochar. Activated carbon, also known as activated charcoal and several other active/activated source-material names, all come down to the implication of the modifier ìactivatedî. When used in conjunction with adsorbents, activated refers to a small set of processing techniques that increase the internal microporosity of the original carbon-rich source material. All activation processes remove individual carbon atoms and create individual nooks and crannies in the carbon-rich material, which are the adsorption sites. The key to activated carbon is that it is optimized for specific adsorption application (water, vapor, certain adsorbates, etc.) and the adsorption capacity is packed into as dense a material as possible to minimize the volume of adsorbent necessary. In the end, activated carbon is an adsorbent ñ intended to remove something, typically organic compounds, from either vapor or liquid streams. Biochar vs charcoal In contrast, Charcoal is a fuel that is used for cooking and other heat generating applications and created by heating biomass, typically wood, under conditions of limited oxygen. In general, charcoal burns hotter and with less smoke than the starting biomass, and also can convert mineral ores to the corresponding metals, inspiring a series of ages: bronze, iron, etc. Biochar is made in the same manner as charcoal, but it is intended for utilization as an adsorbent and/or a soil amendment. Basically, the key is the end use of the material. It is charcoal if it is intended to be used as a fuel; hence it is manufactured with optimal fuel properties. In contrast, if the intended use is adsorption or as a soil amendment, then it is manufactured to a different set of properties and labeled biochar. As a result, biochar shares properties with activated carbon and charcoal, but has a few unique features that distinguish it from both. While biochar shares adsorption properties with activated carbon, it also exhibits a significant amount of ion exchange capacity, a property that is minimal or absent in traditional activated carbons. The ion exchange property, which is usually measured and reported as cation exchange capacity, is due to residual carboxylic acid functionalities on the biochar graphitic backbone. Since activation removes any residual side chain aliphatic groups, activated carbons have reduced ionic interactions. The other big differences between biochar and activated carbons are bulk density and mechanical hardness. Activated carbon is intended for applications where packing as much adsorption capacity into a fixed volume is paramount, like gas masks and fixed-bed adsorbers. In addition, activated carbon can be regenerated and reused in many applications, so mechanical hardness (also known as the lack of friability) allows the carbon to be moved without falling apart or breaking down in particle size. If one combines the lower adsorption per unit weight of biochar with the lower bulk density, the resulting adsorption capacity on a volume basis is 1/6th to 1/12th that of high quality activated carbons. For this reason, biochar is typically used in applications where the material is spread out on the ground, so low density is not a disadvantage. In fact, in soil applications, where an important property is the ability to capture excess precipitation and retain it, the low density of biochar translates into additional voids that can fill when it rains. Unique properties Biochar is a material that is preferred when several of its unique properties can be exploited in the same application. The unique properties of biochar include low density (providing additional voidage and aeration in the soil), significant adsorption and cation exchange capacity, and the ability to promote living microbiology in the soil, enhancing the ìSoil Food Webî. Combining these properties leads to a predictable selection criteria for when to consider activated carbons versus biochar. |
Re: DIY Biochar
Quote:
|
Re: DIY Biochar
Quote:
We use it for it's "low density (providing additional voidage and aeration in the soil), significant adsorption and cation exchange capacity, and the ability to promote living microbiology in the soil" And we don't use any chemical fertilizers, just top mulch and biochar. Here's a bunch that we recently harvested, it's from the first dwarf Bluggoe we grew and up until then I had thought all Bluggoe produce small bunches. I was surprised when it weighed in at more than three times the average bunch size of our local USDA Tropical Research Station and they are the comparison we use. |
Re: DIY Biochar
We grow a lot of large bunches because we want to know what is the minimum we need to do to produce acceptable size bunches.
These bunches are either the first plant crop or the first ratoon crop of some cultivars the local USDA Tropical Research Station gave us to evaluate. |
Re: DIY Biochar
Quote:
Much love. |
Re: DIY Biochar
So what happened with this thread? Two Questions: the difference between biochar and activated was described, but not biochar and charcoal (conflicting notes as one line said they were the same, another suggested there were differences). We have large quantities of charcoal left over from disposal of land clearing debris - often thought of the bio-char in the Amazon and the stories about the wonders it did down there.
BUT have no idea as to how much to use of it or what best to mix it with. Our native soils are heavy clay. As we have access to unlimited (500,000 tons) amounts of very aged (over ten years) compost (The largest compost facility in the US), we can "make" whatever we want. We use maybe 2000 tons of this compost a year. we also have access to almost unlimited amounts of aged street sand (sand swept up from streets and then allowed to sit for more than a year, generally three or four, in shallow beds 3 feet deep to "rinse" it should there be anything detrimental in it. We use maybe 200 tons a year of it and plants seem to love it - do not use on vegetable or any edible crops as fear there may be lead contamination (tests do not show it, but as it comes from all over, we do not test every batch due to cost - rather use it on plants where it does not matter.). |
Re: DIY Biochar
Resurrecting this thread because I now know what I'm doing, and made 5 gallons of it this year. Currently activating/charging in a plastic wheelbarrow. I bought a bag of lump charcoal (I know the difference between lump and briquettes now, LOL) as well as raking some from the fire pile and sifting the ashes, which will go into the garden later on, although I used some already.
I reduced the char down to manageable sized pieces in a frying pan with a sledge hammer. That then went into the blender in small amounts. I use the blender specifically for charcoal and eggshells. Do NOT use the kitchen blender unless you are single or wish to become so again. You might buy one at Goodwill or something to use for this. I got a new Oster at Walmart for only twenty bucks. I ended up with a 5 gallon pail of powder and pencil eraser-sized chips. If you are using stuff from the burn pile, make sure you check it for stones and nails. I did, but still got some interesting sparks every now and then. I mixed in some sulphur, sugar and flour for an extra microbial boost, and then added five gallons of urine to activate it. For most people this might not be an efficient or even feasible method, but since I produce 2-3 gallons of the stuff a day, it works well for me. I kept adding until it was absorbed, then did it again. Now, I'm adding a gallon or so a week to replace what has evaporated or may still absorb. Finally, keep it moist but not saturated, to mix in with your soil. Don't let it dry out, and don't seal it in an airtight container or the microbes will die off. The larger the pieces, the longer it will last, but at lower output rates. The small stuff and powder will only last a season or two but will put out like a young Madonna looking for a recording gig. |
Re: DIY Biochar
Quote:
Edit: I read on a Permies thread that a commercial farmer uses 14,000 pounds per acre at a half inch deep and tills it in. Probably a better comparison for your situation. |
Re: DIY Biochar
Put as much in as you want......
Charcoal is an benign amendment.... It becomes awesome when you charge it before you mix it in your soil. |
Re: DIY Biochar
Quote:
 How to bust up your charcoal for your soilless mix by Hostafarian, on Flickr |
Re: DIY Biochar
Quote:
|
Re: DIY Biochar
Quote:
Perlite has a cation ratio of zero Moisture is also important for plants and biochar/horticultural charcoal holds much more moisture than perlite and lump charcoal holds very little. |
Re: DIY Biochar
Quote:
|
Re: DIY Biochar
Quote:
Perlite is essentially inert; it's like puffy popcorn sand that allows drainage, but charcoal not only allows that space, it is very absorbent. 1 gram of the stuff has the same surface area of several football fields. 5 gallons of char eventually absorbed 6 gallons of urine. I daresay that 5 gallons of Perlite might absorb less than a half gallon if that; mostly due to surface tension. Not trying to inject myself into someone else's argument, but this is my experience with biochar. In addition to the 20" leaves on the pumpkins (usually around 6-8"), even the tomato to the left has 6" leaves according to the ruler, and in a few weeks, you'll see the harvest as it begins to ripen. I've never had this many maters or cukes on the vine, and my parsley is close to two feet tall. BTW, that's a steel ruler that leaf is supporting. Think they grow 'em big in Texas? Texas ain't got nuthin' on North Carolina! |
Re: DIY Biochar
Quote:
South Carolina is home to the Irish Travelers (a group of con artists). |
Re: DIY Biochar
Quote:
|
Re: DIY Biochar
Quote:
|
Re: DIY Biochar
Okay Mike, I'll bite...
Perlite is essentially rock popcorn and can't retain moisture. Good for drainage, but that's it. Lump charcoal is hydrophobic and will actually shed water like a dry sponge. Biochar has been inoculated and dampened, and will absorb water and nutrients like a damp sponge. With what he said, do you disagree? :confused: |
Re: DIY Biochar
Quote:
 |
Re: DIY Biochar
Lump charcoal refined(broken up to smaller pieces) to biochar size can hold a fair amount moisture.
Biochar is lump charcoal crushed and repurposed for growing plants. The smaller the charcoal particle size the more moisture it will hold. The larger size of the charcoal the the less moisture it will hold. Same with perlite. The smaller the particle size the more moisture it will hold. And the larger particle size the less moisture it will hold. Perlite is a fantastic medium for hydroponics . Both materials mentioned above will hold up to 40% +moisture and nutrients for your plants. The op in the first post is spot on ...how to make lump/biochar. |
Re: DIY Biochar
Quote:
I use all three materials that you mentioned. I make my own biochar like you by soaking(charging) the broken up store bought lump charcoal pieces in a slurry of organic ferts. Same charging process with the medium perlite I use. I choose lump because it is already made and in a bag. I could choose to do a burn pit and make my own ....So what is the difference between what is in the bag and what is left in the pit? Something more controlled and scientific a better product? The end result is whatever you want to call it.:) A quick internet read keywords/"water retention of perlite/crushed charcoal/lump charcoal will give a better understanding of just how much moisture these substances are able to absorb and release. Another Youtube search "how to make biochar/charcoal " will further help forum members understand the process. |
Re: DIY Biochar
Quote:
|
Re: DIY Biochar
Quote:
Al's gritty mix. Thanks for the link.... I have made that fantastic mix a few times.....with crushed lump charcoal aka "biochar" "char" 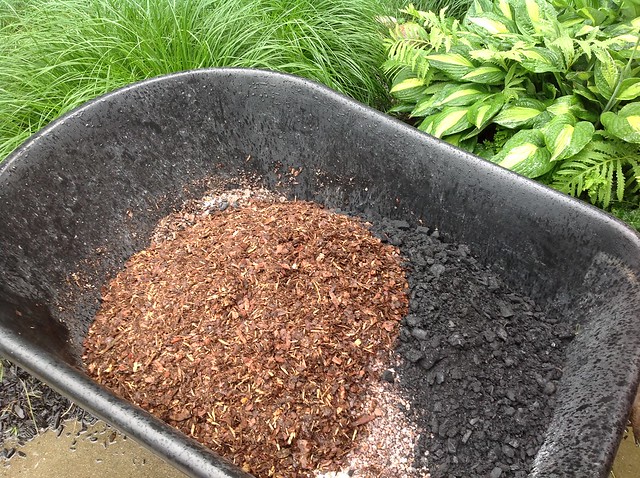 Al's gritty mix with crushed lump charcoal by Hostafarian, on Flickr. |
Re: DIY Biochar
Ok, sound s like a lot of you have a very good understanding of this topic. I am curious what yor thoughts on this question might be.
I do make my own charcoal in 2 different ways. I have a top down updraft burner I made out of a couple of 55 gallon drums which I will fire up 2 times a year or so using wood chips, branches, small tree trunks, etc. and I also have a regular burn pit into which I throw most other things that don't go into the compost. With the burn pile I of course get a lot of ash but also a lot of what looks like charcoal. With the tdud burner it's of course all charcoal, very little ash. My question is this: is there a significant difference between the 'charcoal' from the burn pile and the tdud burner? |
Re: DIY Biochar
Quote:
The pure charcoal will need to be activated and it will have a more neutral pH. It's all in the details. If you want to make real Terra Preta, use the stuff from your burn pile and maybe break the bigger pieces up. Add sawdust and other composting materials like coffee, grass clippings, meat and bone scraps; anything that will break down, and let it sit for a few seasons, turning occasionally. You can also add some sand. When you harvest this, just like a crop itself, make sure you get all of the dirt from underneath as well and mix it thoroughly. Terra Preta was essentially what came out of garbage pits. They found it was very fertile, and began a regime of mixing it into their poor soils. While the potsherds may act like stones in your garden, do you really want it there? The broken pottery is in the original formula simply because these were trash heaps. I suppose you could recreate this with gravel or volcanic cinder (what most stores mistakenly call lava rock), but it certainly isn't necessary. Since you're in BC, you probably have access to some good, rainforest floor humus nearby to add in as well. Probably longer than you wanted, but while it was technically a yes/no question, it needed some further explanation. If you ever have the opportunity to visit a place like Yellowstone that has burned, look at the same spot ten years later, and you'll see the advantages of having all the other things like ashes in the ground as well. |
Re: DIY Biochar
Wow, detailed response, thank you!
When you say 'activated' what specifically do you mean? I hear the word 'charged' used a lot to denote the process of promoting nutrient uptake before using around plants. And then there is 'activated charcoal' which as I understand it is a product specifically processed, haven't researched how its done, to increase surface area. Are you talking about one of the above, both, or something different? Thanks again for taking the time!, very much appreciated!! |
Re: DIY Biochar
Activated/charged is the same thing. A gram of charcoal has the square footage in surface area, of a couple football fields. And you thought a cat having the same square footage as a ping pong table was amazing!
Needless to say, charcoal is very absorbent. If you don't fill those voids before you put it in the ground, it will suck all of the nutrients out the soil, as well as almost all of the water you add. So, you need to activate or charge it, by subjecting it to nutrients and moisture. Different wording, but it means the same thing. Inoculated is another word. I could go on ad infinitum about this, so if you have additional questions, feel free to PM me, or email me via the addy on the redwood site. Unless inquiring minds want to know, in which case I'll share what I learned almost three decades ago, when first potting redwoods. |
Re: DIY Biochar
Activated/medical grade char has an additional controlled process which an additional inert gas(look it up) is introduced in the char process which increases the porosity of the char.
Backyard burners do not achieve this. But... what we backyard growers do is adequate. Charcoal becomes biochar after it is introduced to the ground. Btw I made 2o lbs dry weight the last few days. soaking/charging in three 5 gal buckets. I used a 1/2 cup Espoma Bloom buster with a teaspoon of mychorizza as a kicker per bucket. Cost 16.00 us |
Re: DIY Biochar
Quote:
And I agree with Cincinanna - Sharing whatever knowledge you feel like sharing on the forum works for me too! |
Re: DIY Biochar
As requested, here is a pic of 2 different charcoal making burners of different sizes.
Super easy to make! The bigger one is made from two 55 gallon drums and a heating duct and the smaller one is made from a 5 gallon paint can, a standard paint can (not really necessary) and....well, another piece of heating duct. total time to construct both about 3 hours Total cost was about $35 US - most of that because I couldn't find free 55 gallon drums. |
Re: DIY Biochar
Quote:
I suppose you did all the cutouts with a wheel or torch? Do you make your char for the BBQ or the garden? Looks like a project that would be interesting for me to do. |
| All times are GMT -5. The time now is 12:53 PM. |
Powered by vBulletin Version 3.6.8,
Copyright ©2000 - 2026, Jelsoft Enterprises Limited.
All content © Bananas.org & the respective author.